6 Best Tips From OpenArt’s New Prompt Book
The "Stable Diffusion Prompt Book" by OpenArt has tons of helpful insights to help you craft better prompts and get more out of text-to-art generators.
Guys!
OpenArt just released a free “Stable Diffusion Prompt Book.”
It’s jam-packed with detailed tips and examples for crafting better, more intentional prompts. All accompanied by great demo visuals.
Honestly, if you’re at all interested in AI art and want to upskill, go grab the book right now!
But it’s quite detailed, so it takes a while to sift through.
Luckily, I went ahead and picked out six of the most actionable takeaways.
Here you go:
Tip #1: Word order matters
AI algorithms tend to prioritize words according to their placement in the prompt.
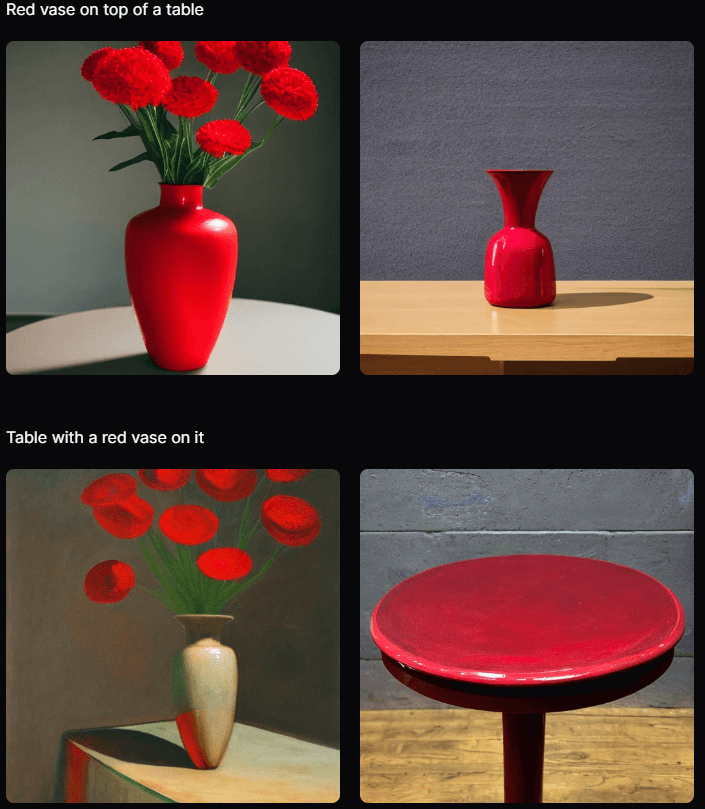
Example: “Table with a red vase on it” is less effective than “Red vase on top of a table” if the “red vase” part is important to you.
Here’s what you get using the two different prompts for two random seeds:
Quite a difference, right?
None of the lower examples actually end up with a red vase.
Tip #2: Learn your modifiers
There’s a huge number of modifiers you can use to get very specific results out of your prompt. Some key types of modifiers:
Photography (shot type, style, lighting, context, lens, device, etc.)
Art medium (chalk, graffiti, water colors, oil painting, pencil drawing, etc.)
Illustration type (isometric, low poly, 3D render, vector, splash art, etc.)
Emotions (cosy, romantic, joyful, grim, regret, fear, etc.)
Aesthetics (acidwave, dreamcore, post-apocalyptic, film noir, etc.)
The book lists many more and is still far from exhaustive.
Pro tip: Use a prompt builder like Promptomania to discover and experiment with all kinds of modifiers.
Tip #3: Try mixing multiple “artist” tags
As I’ve shown in an earlier experiment, the “artist” modifier is really powerful as it encompasses many of the above individual ones.
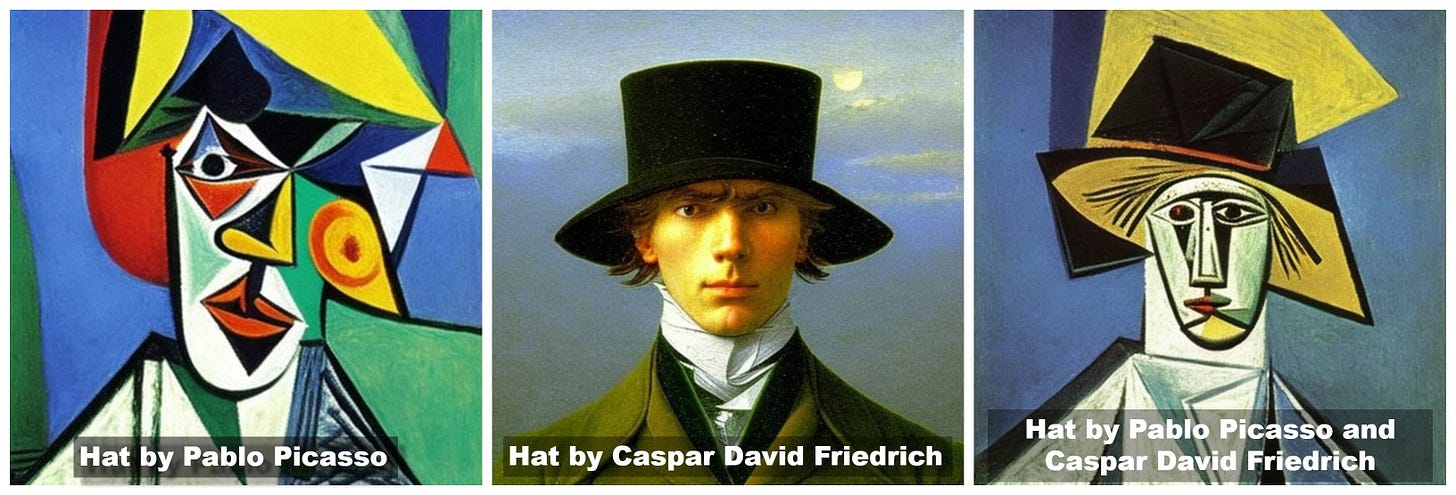
But you can create something truly unique by mixing multiple different artists. Try adding “by [artist A] and [artist B]” to your prompt.
Example:
Pro tip: Visit Urania.ai for a massive list of almost 2K artists known to Stable Diffusion, as well as examples of their visual style.
Tip #4: Use “magic” words
The book highlights several modifiers that are especially impactful, such as:
HDR, UHD, 64K, 8K, or 4K: as you’d expect, these tend to create sharper, higher-quality images.
Highly detailed: fleshes out minor details in images, such as facial features.
Studio lighting: adds texture to an image, especially photos.
Trending on ArtStation: imbues images with modern artistic flair. Most useful for fantasy and sci-fi art.
Unreal engine: creates realistic 3D renderings of objects.
Vivid colors: breathes life and color into otherwise bland images.
Bokeh: puts the subject in focus while blurring out the background. Great for portraits and object close-ups.
High resolution scan: this one’s a bit niche, but it can often make your image look like a black-and-white historical photo.
Tip #5: Know the best beginner settings
Most Stable Diffusion tools let you adjust the parameters below.
(If your tool doesn’t, simply ignore these tips.)
Here’s what the book recommends as the best settings for beginners:
Resolution: 512x512 pixels.
Stable Diffusion was trained on square images of that size and tends to give the best output when using those dimensions.
Classifier Free Guidance (CFG): Between 7 and 10.
Below that, the model might ignore key parts of your prompt.
Above that, the image might end up having unwanted artifacts.
Step count: 50
This tends to be the default with most tools and is typically more than sufficient to get the right final result.
Sampler: DDIM
Apparently the best at generating coherent images quickly and even at lower step counts (around 10).
Tip #6: Be efficient with your prompts
Stable Diffusion has a token limit of 75.
What the what now?
Tokens are common sequences of characters in a text string. You can use this OpenAI tokenizer to estimate how many tokens your prompt has.
In short, you must keep your prompts to under 75 tokens as everything beyond that will simply be ignored.
So find ways to shorten your prompts by using words more efficiently.
Example (same seed used for both images):
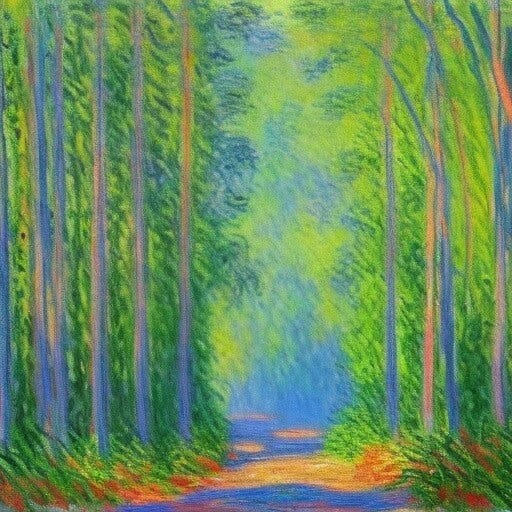
Here’s a “Painting of a forest in the style of Claude Monet” (12 tokens):
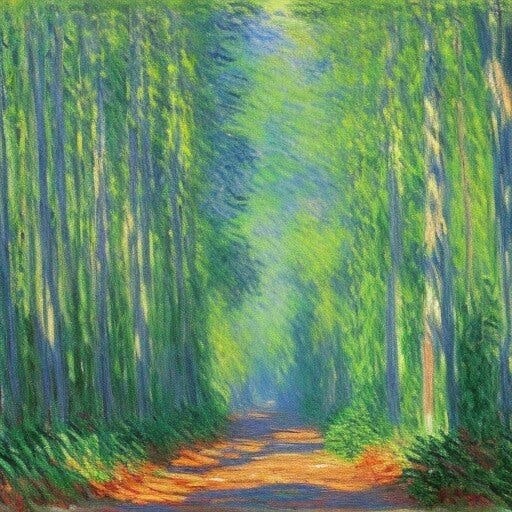
And here’s a “Forest by Monet” (4 tokens):
As you can see, they’re very similar in terms of both style and composition, despite one prompt having 3 times as many tokens. That’s because:
“Painting of” is redundant. Monet was a painter, after all.
“Claude” is unnecessary as the model can identify Monet by last name.
“By” is shorter than “In the style of” while conveying the same meaning.
With practice, you can learn to create lean, precise prompts that get you the results you want with fewer words.
Over to you…
Have you already read the book? Did you learn any tricks that you find extra useful? Do you know any other helpful resources for prompt engineering?
If so, I’d love to hear about them. Send me an email or drop a comment below!


